by Dave_Mulkey@fis.edu , Frankfurt International School , Germany
You should do one of the following:
- make funny pictures and hang them on the bulletin boards
- practice typing (probably better to do the typing games)
- exercise your brain with www.gamesforthebrain.com
- make a video game on www.sploder.com
We are going to play games today - but NOT video games.
We are going to play games that exercise your brain.
You can try out the games at this site:
http://www.gamesforthebrain.com/
or you can try something else from some other web-site,
but it must be a thinking game - not a video game.
Despite many rumors and claims to the contrary,
keyboards are still a major source of data input.
If you are t y
p i n
g s
l o w
l y
with 2 fingers, you are going to be disadvantaged
throughout your high school and college career -
even worse if you are doing your typing on a
flat screen like a smart phone or a tablet.
You should do your best to improve your typing speed,
preferably learning to type with all your fingers
without looking at the keyboard. The time you spend
learning to "touch type" will be rewarded over and over
again throughout your life - or at least until we invent
a direct link between your brain and the computer.
Today we will practice typing - typing as fast as possible.
Here is a web-site with typing practice games:
You can also take a test (or lessons) here:
http://typingclub.com/typing-qwerty-en.html
Or try competing against other human beings at:
http://play.typeracer.com/
Yes - 45 minutes of typing practice.
Be sure to take a test at least once.
Finish your business cards today. Be sure to give one copy to the
teacher.
Use the others to label your pictures on the bulletin boards in 276.
Your task today is to make your own business cards.
You should make one page with 6 or 8 copies of the same card.
Then print the page and cut it up into separate cards.
Give one card to the teacher, and then pin one of the cards
on one of the pictures that you posted on the bulletin board in 276.
Do this on Linux or on a Mac, whichever one you DON'T normally use.
Choose an appropriate piece of software for the task.
Here are some design ideas : http://ibcomp.fis.edu/busicard/BusinessCards.htm
We will meet in room 322 during period 3.
Operating Systems
There are lots of Operating Systems (OS) on various computing devices, including:
Applications
Appications are PROGRAMS that are written for a specific computer platform.
For example, Microsoft Office was created for Windows PCs (but also runs
on Macs now),
iLife is a set of applications that run on Mac OS, Evolution is an eMail
program for Linux.
Many applications are cross-platform, meaning they run
on several different OS's.
Some popular cross-platform applications include:
Searching for Re-usable and Multi-platform Software
Considering the rapid and ever growing expansion of various computing
platforms,
it's a good idea to search for good software that runs on multiple
platforms,
or at least multiple machines, without requiring repeated installation or
suffering
compatibility problems.
One way to improve or guarantee flexibility is to find applications (or
apps)
that run on many platforms. Another possibility is to use different
applications
on different platforms, but use them to do the same work.
Data-centric Computing
While applications are an important part of computing, the actual WORK we
do
is stored in data files, such as documents,
images, videos, and spreadsheets.
If you have a document, say an essay, you can probably open it in
a variety
of word-processors on a variety of applications. As long as you can
open the same
document on various platforms, it shouldn't matter too much what
application is
running. BUT, you might not notice that opening a document in a
different
word-processor, you might lose some of the details. For example, if
you open
an MS Word document in Libre Office, it might ruin some of the formatting
details.
Flexibility Hunt
We will spend a few days experimenting with various tasks on various
platforms.
You might not be able to try all of these experiments. In any case,
don't break
the machines by performing wild and crazy experiments. If you have
Linux and
Mac and Windows available, try tasks on all three OS's.
Answer as many of these questions as you can. Take notes – either on a piece of paper or in a word-processing document. We will discuss your answers next week, so bring your answers to class next week.
(1) Is there a simple “text editor” in Ubuntu (hint: try typing “text” into [Home])
(2) There is a calculator in Ubuntu. How do you change it so that it has [sin] and [cos] buttons? After changing the format, does it stay that way the next time that you start the calculator?
(3) Open Libre Office.
(a) Make a new Word Processing document.
(b) Type some short text into your document.
(c) Connect to a printer (ask the teacher how to do this) and
print your document.
(d) Make a new Spreadsheet document in Libre Office.
(e) Add up some numbers, like 1+3+5+7+...+99 .
Is there an easy way to
type all those numbers?
(f) Open the LibreOffice Draw program.
(g) Copy an image (any image) from Google Images into Libre
Draw.
(h) Find out how to do normal things in Libre Draw, like:
--- highlight, cut and paste
--- draw lines and circles
--- change colors
(i) Save your picture and then UPLOAD it to DropBox or Google
Docs
or some other “cloud” service.
(4) In the Software Center, find the “Educational” software.
Find a program that you understand and that seems useful or entertaining.
We will investigate Ubuntu Linux, by using it on the PCs in our classroom.
Watch this video about why Linux is important:
http://www.youtube.com/watch?v=yVpbFMhOAwE
Then watch this video about the Ubuntu Phone :
http://www.youtube.com/watch?v=I4a9mI0qsaI
especially from 5:20 to 13:20.
Spend one more day either making fun pictures for the bulletin board or making video games.
Making Video Games : http://www.sploder.com
Making Fun Pictures : http://www.hongkiat.com/blog/25-websites-to-have-fun-with-your-photos/
Try this : http://www.sploder.com
Make a game - make several games.
If it's not fun, you're doing something wrong.
If you prefer, you can make some more funny pictures.
Here is a web-site with lots of programs/services that make funny
pictures:
http://www.hongkiat.com/blog/25-websites-to-have-fun-with-your-photos/
You can start with a picture of yourself. If you prefer, use a picture from Google images.
Use one of these services, or a different service if you wish, to make a
funny photo.
It doesn't need to be a face photo - do any image you wish. But it should
be interesting
and must NOT be offensive.
Make something interesting that we can PRINT and post on the BULLETIN
BOARD in 276.
Use the 277-Color printer. Write your name on the printed picture before
posting it.
The goal is not to make as many pictures as possible, but rather to make
one or
two really interesting pictures.
Due Date : Friday 24 May 2013
http://dl.dropboxusercontent.com/u/239179/comptech/betterITsystems/index.html
Tools
http://cooltoolsforschools.wikispaces.com/
Investigate some of these tools. Find a tool (preferably an online
tool) that is easy to use and accomplishes something interesting.
Try several tools until you find something useful.
Computer Systems
http://dl.dropboxusercontent.com/u/239179/comptech/linux10/Effectiveness.pdf
Instruction
http://dl.dropboxusercontent.com/u/239179/comptech/betterITsystems/index.html
Here is a sample set of instructions:
Adding Up a Number Series in a Spreadsheet
Finish your Scratch game and turn it in BEFORE MONDAY 6 MAY.
- Find the Scratch (.sb) project file.
- ATTACH the file to an email and send it to the teacher.
Read these notes about creating
a
multi-level game in Scratch.
This game is due on 2 May or 3 May (depending on when class
meets).
The teacher will demonstrate how VARIABLES can be used to keep score
in a game. For example, getting extra points when you touch a "good
guy"
and losing points when you touch a "bad guy".
We will make a very simple game, using the following techniques:
- using the keyboard to move the cat
- detecting when the cat touches another Sprite
- sending messages from one Sprite to another
Here is an example simple game : SimpleGame
Here are the commands for this game:
|
|
|
Practice : Make your own simple game, as follows -
Start with a cat
Add commands to move the cat when
keys are pressed -
you will made several commands to respond to several keys
Add another Sprite that is moving constantly (forever)
Add an if.. command that
detects when the cat touches the other Sprite
and move the cat back to the starting point when this happens
Now add more Sprites. Make at least
one "good" Sprite (like food)
that does something good when the cat touches it
Organize the Sprites and movements so that
it is difficult but
not impossible to reach the "food"
Add some sound effects
The teacher will demonstrate the use of CONTROL commands for Repeat, When Clicked, etc. - like this example
Here is a video tutorial about the same thing: http://learnscratch.org/sc1-l2
Practice : Use Repeat or Forever commands to make
several sprites
that all repeat the same actions over and over
again.
Here are some more Scratch links you might find useful:
Scratch
Video
Tutorials
Scratch Tutorials
Scratch Reference Manual
Continue trying to do the practice tasks at the bottom of this page:
Simple
Scratch
Programs
You'll probably find it helpful to read the notes as well.
You might find the following helpful:
YouTube Video Tutorial:
http://www.youtube.com/watch?v=0pxaFzRtx7k
Try searching in Youtube for "Scratch Tutorial"
Scratch Reference Book
http://dl.dropbox.com/u/239179/comptech/scratch/ScratchReferenceGuide14.pdf
In the HELP menu, look at Help Page - Getting Started
Ask other students whether they found any useful tools.
Your goal is to make an animation that has several different
"sprites" moving around in various ways.
Starting Scratch
We will be writing programs in Scratch, a programming language for young
students
created by MIT. Scratch provides hosting for student projects on their
site at http://scratch.mit.edu.
Today, do the following:
- go to http://info.scratch.mit.edu/Scratch_1.4_Download,
download the software and install it
- read these notes Simple
Scratch
Programs
You might want to make an account at scratch.mit.edu.
Then you can download other people's projects and change them.
You need to turn in your game today. Do the following:
Right-click on the FOLDER containing your
game and COMPRESS
the folder into a .ZIP archive
Write an email to the teacher containing
CLEAR INSTRUCTIONS
how to successfully win the game - step by step instructions
for proceeding from the beginning to the end
Attach your .ZIP archive to the email and send it to the teacher
Continue creating your adventure game.
Remember that it is due on Friday 22 March.
It should have at least 20 pages, but the actual
goal is to make an interesting and understandable game,
so 20 pages might actually not be enough.
Try to create some pages with interesting interactions
like the JavaScript below. Also, most pages should
have a picture, and embedded videos on some pages
will make it more interesting.
This
page
demonstrates how more complex JavaScript can
make a game page more complicated. Here is the HTML
and JavaScript code for the page.
|
<!DOCTYPE html> |
Test on H-Day ?
Tuesday is H-Day, but we will NOT have a test, due to various
disruptions this week.
TODAY
Continue making your Adventure game. Try to put a picture on
most pages, as that makes the game more fun and interesting.
Keep adding pages.
Next week, the teacher will give you some ideas how to make
more interesting interactions, using more complex JavaScript commands.
For today, just add more pages - you can always improve them later.
Concentrate on the overall LOGIC of the game.
Today
You should get at least 3 pages created for your game today.
They don't need to be perfect - you can always change them later.
Make a STARTING.HTML page
- Put at least one image on the starting page
- Make at least two BUTTONS
- When one BUTTON is clicked, it should go to another page - say
SECOND.HTML
- When the other BUTTON clicked, it should go to a third page - say
THIRD.HTML
Make sure all 3 pages are stored in the
SAME FOLDER
Use a JavaScript command like this to change pages : location
= 'SECOND.HTML'
Put at least one image on each page
On the SECOND and THIRD pages, add some buttons
Start making a plan for your story - maybe sketch out CONNECTIONS
between pages
on a sheet of paper
Your finished story will be due on Friday 22 March. That's
an H day. The "test" that day
will be turning in your adventure game and answering a few questions about
it.
BlueGriffon Problems?
If you are having problems with BlueGriffon, get help from the teacher.
If you have too many problems, you can use Kompozer or SeaMonkey instead.
We will try using BlueGriffon this week. If you don't like it,
you can always go back to using Kompozer or SeaMonkey -
or some other editor that you prefer. The same HTML
and JavaScript commands will work in any editor.
If you are using a Windows PC attached to our cabled network,
you need to set the Proxy Server before writing your page.
Go to [Tools][Preferences][Advanced][Network][Parameters]
and type in [defender.fis.edu] [8080]
Here is another Sample Adventure Game .
This one has
a video on each page (each location). It uses
simple
JavaScript commands - alert and prompt - to respond
to the user's choices. The teacher will show a BETTER
way to write JavaScript commands that respond to onclick.
Make a starting page for your game, similar to the
starting page in Sample Adventure Game
, but this should
be a page for YOUR game. And you should just use an
image in your page - no need to use a video. Make appropriate
choices, like "Do you wish to play the game" - "YES" - "no",
and make it change to a second page after they click "YES".
Download - you need to download a copy of BlueGriffon
You can copy it from V:\Mulkey
Dave\blueGriffon - that's faster
Making a Story
You are probably familiar with the idea of showing a STORY
in a computer -
but you probably don't call it a "story". You would think of:
PowerPoint Presentations
Video games
Multimedia presentations
Web-sites
We are going to make an Adventure Game. This is a
"branching" story,
where you make decisions and move on to the next "place" in the story.
Here is several examples you can try out.
We will use JavaScript for this project. It's
certainly possible to create
computerized stories with other tools, but JavaScript is an excellent
programming language to learn, as it is the most common
language
used in the World-Wide-Web.
Here are some suggestions for getting started:
Each page follows the same design - with one picture, a description below, and buttons or links below that.
Use BlueGriffon - that is a fast, simple and efficient editor.
Start by using links to jump from page to page.
Later you can use some Buttons with simple JavaScript responses. Look at the HTML SOURCE of the example game to see how to write the JavaScript.
Before you start creating web-pages, you should make a plan - perhaps sketch out the design of your story ON PAPER.
== Getting Started ==
Think of a scenario -
that is, where will the adventure take place and
what sorts of things will happen. Here are some suggestions:
- shopping center
- airport
- a city
Think of a general story that is connected to Winter or Winter Holidays.
Think of 3 locations - the beginning, the middle, and the end.
Get a picture for each of the 3 locations above.
Write these 3 pages.
Once you have started, spend a little time to think about the story, and sketch out some ideas on paper. Collect some pictures and then start making pages.
**** VERY IMPORTANT! *************************************
Put ALL THE WEB-PAGES and ALL THE PICTURES in ONE FOLDER.
**********************************************************
Otherwise you will never be able to put the story in your ePortfolio - the links won't work.
== Goals for the Assignment ==
The story is NOT about school - almost any other scenario is acceptable.
Pages use a consistent format and there are MANY pages (aim for 15 or more) - so it will be substantially longer than the Escape FIS story.
Most pages have a picture on them.
At least 2 pages contain a short video
Some of the pages use JavaScript for pop-up messages.
Some of the pages contain "secrets" that are needed for later pages - like a password or a secret number to unlock something.
Make it interesting and fun, and graphics should be approriate and meaningful.
... more info coming soon ...
Test - Create a web-page as described on your test paper.
Then show the working web-page to the
teacher.
Homework -
Read
this article about CODING (programming)
and watch the 2 videos attached to the article
Have a look at this web-site : http://www.code.org/learn/codecademy
REMINDER - Test on H-day, Thursday 28 Feb
During your test on Thursday, 28 Feb, you will need to create
and/or fix a web-page contianing JavaScript, Buttons and Images.
Today -
Learn to HIDE Buttons and Pictures, as well as changing colors.
Click to see
what color
is best
(1) Color Change
to make a button that changes colors
- insert a button
- go to [Button Properties][Advanced
Edit][JavaScript Events]
- create an [onclick] event ==> this.style.background
= 'green'
(2) Disappear
to make a button disappear
- insert a button
- go to [Button Properties][Advanced
Edit][JavaScript Events]
- create an [onclick] event ==> this.style.visibility
= 'hidden'
Find out how to
embed a YouTube video in a web-page
- find a video
- share
- embed
- copy HTML code
- paste into an [Insert][HTML] box
embed a game in a web-page
embed a Java Applet in a web-page
Read these notes and make your own quiz/review page using Buttons and Alert commands.
Continue creating your Button+Picture page.
Add as many Buttons and Pictures as you can today.
In the next class we will learn to make more complex interactions.
Make sure you are using Firefox - and that this is a recent
version, say #18.0 or later.
If you do not have that on your computer, get help from the teacher.
If your Buttons are not working, get help from the teacher.
We have made web-pages containing information and pictures.
We can also make interactive web-pages that respond to user
actions
like clicking buttons.
Read these notes.
Practice Word-Processing mathematical documents.
Here
are
some sample problems. Choose on of them
and draw it exactly the same (except ignore the blue background),
including using the equation editor to write the math formulae.
PRACTICE! The goal is to become fast, to learn where
everything
is located so it's easy to find. The test on Friday will require you
to work quickly and productively and correctly.
Test tubes and beaker diagram from the Equation Editor.
Finish drawing the classroom.
Print the result on the ATRIUM COLOR printer.
Be sure to include your name, a title and the date in the HEADER.
Show the result to the teacher, then make any necessary improvements.
If you finish early, you can start doing the HOMEWORK below.
Homework
1. When drawing shapes, the program shows the MEASUREMENTS of the
shape.
Find out how to change these UNITS from INCHES to
CENTIMETERS and back again
2. Find out how to draw an REGULAR OCTAGON (8 sided STOP SIGN,
equal sides)
3. Look
at
these big patterns - called TESSELATIONS.
Figure out how to draw these patterns QUICKLY and
EXACTLY.
Use MS Word to draw a diagram of the desks, PCs, chairs and doors of our
classroom.
Use the DRAWING TOOLS to draw a box for desk, another box for each
chair.
Show where the walls, windows and doors are located. Use colors to
make it attractive.
Don't forget the bookshelves, cupboards, and the BIG BOX.
Be sure to include your name, a title and the date in the HEADER.
Make sure it all fits on 1 page and PRINT IT on the ATRIUM COLOR printer.
Show the teacher your diagram when it is finished.
You have 2 class periods to complete this. Make the BEST diagram you
can
in 2 class periods - that is 1.5 hours.
There are 3 tasks to do today to complete your Biography Report:
Print on paper, staple the pages together, submit to the teacher
Create a PDF version of your Report
- in MS Word [File][Save and Send][Create PDF]
Upload your PDF file to DropBox
and add a Link in your WIX ePortfolio
Test today
Your Biography Report must be NO LONGER THAN 5 PAGES (printed).
Throw out all the uninteresting stuff. Cover the life from birth
to death, but concentrate on the most INTERESTING information.
Here are some hints that make it easier to format your document:
WP
FAQ
(Frequently Asked Questions)
Remember we will have a written test on Tuesday 29 Jan.
This will contain lots of TRUE/FALSE questions about good practice
for word-processing and research, as presented in the notes
and
instructions.
We will be doing the printing on Wednesday 30 Jan.
So make sure your report is finished and formatted before Wednesday.
TEST REMINDER - If you did not take the test last Thursday,
you must take it DURING CLASS this week. You can
choose the day that suits you.
Continue doing research. Be sure to COPY THE URL ADDRESS first,
before copying text.
*** Monday 21 Jan - SNOW DAY ******************
Continue doing RESEARCH for your Biography Report.
Use some time today to make BACKUPS - extra copies
of anything that is important to you.
********************************************
Example : Malcolm X
Your biography report will be similar to the one above,
but not identical. When finished, you will print your
biography on paper and turn it in.
Instructions for Biography Paper
There is a test scheduled for today.
It was announced on Jan 9/10.
Apparently some students did not carefully
keep track of this date, and realized very
recently that they have "too many tests today".
Presumably most students have prepared for the test
and wish to take it at the scheduled time.
However, if this is inconvenient, anybody who
wishes to postpone the test can take it later.
During semester 2, Computer Technology will
have a WRITTEN TEST on each H day. The dates are:
29 Jan, 8 Feb, 28 Feb, 12 Mar, 22 Mar, 17 Apr,
29 Apr, 4 May, 27 May, 7 Jun, 19 Jun.
If any of these dates are conflicts, you need to
inform the teacher by Monday 22 January.
Otherwise, there will be a scheduled test on each day
as written above.
~~~~~~~~~~~~~~~~~~~~~~~~~~~~~~~~~
For those who are choosing not to take a test today,
here is a brief description of the first assignment
that we will do in semester 2.
~~~~~~~~~~~~~~~~~~~~~~~~~~~~~~~~~
Research Essay
FIS students are expected to do research essays.
They normally use a computer to access the Internet
to do their research (in addition to reading books).
Then they use a computer to word-process their essay.
This includes copying text, copying images, typing text,
typing citations, and printing the result.
We will investigate the best tools and best techniques
for this kind of work.
Biography Example
As a practice exercise, we will be writing a biography
paper. A biography is the story of a REAL PERSON'S
life. It is not fictional - it is factual. For this exercise,
you need to:
choose a famous person - a real human
being -
and it must be someone who is no longer living
collect FACTUAL DATA and INFORMATION about
your subject person
collect interesting and informative pictures
about your subject (no videos)
You are NOT PERMITTED to use YouTube or any other
video web-sites as a source
keep a complete record of the sources of all your information
We will also be learning how to use a word-processor
more productively, but for today it is sufficient if you
begin doing the research.
Further details about this assignment will be available tomorrow.
Remember - you will have a test on Thursday 17 Jan.
Prepare by answering these questions.
Here are some possible answers (probably correct).
We are going to make slide-shows using the photos we took.
Here
is
an example of a slide-show.
There are many web-sites with slide-show tools.
There are many web-based tools for making slide-shows:
- WIX
- flickr
- Picassa (Google)
- lots more available on the web - search for "slide show free"
You should do the following:
- get at least 30 photos of the school (FIS)
- decide on a sensible ORDER for the pictures - which one first, which one
last
- upload all the photos (make sure they are all under 100 KB first or you
will
be waiting a long time
- build your slide-show
- each student must create their OWN slide-show
Test Announcement - We will have a written test next week
on Thursday 17 Jan
about memory, bandwidth, data transmission
and images.
Today we will collect all the photos taken last class,
and discuss how to make this data transfer easier and faster.
Big Question - How can we SHARE photos effectively?
Experimental Tasks -
Using the camera you brought (or working with another student)
go outside and take 4 interesting photos of our school.
Spend no more than 10 minutes then return to class.
Choose INTERESTING objects or scenes to photograph.
We will create slide-shows about FIS, using all the photos
that the class collects. Each student will make their
own slide-show, but we can all share all our photos -
you may use other students' photos in your slide-show.
Now do as many of the following as you can:
- Find out how much memory your camera has -
probably in GigaBytes.
- Find out how many megapixels your camera has -
that is the resolution.
*** Find out how can you upload (copy) a photo from your camera
into a computer.
- After copying your 4 pictures into a computer (if possible),
find the amount of memory required to store each photo
(that will be in MegaBytes or KiloBytes).
- Open a photo editing program like GIMP or XNview or iPhoto.
Open one of your photos. Decrease the size to 1/2 as big -
half the width and half the height. Save the new photo.
Compare the new storage size to the old storage size.
- Open (or keep open) your new smaller photo.
Now do "Save As" and choose a different image format.
If you already used JPEG (.jpg), then try .PNG or .GIF.
Find out how to make a very small, highly compressed file.
- Find out how to save-as .JPG and choose a very high
amount of compression, to produce a very small file.
Now view the resulting photo in a browser.
Does it look good?
- In Google images, find a VERY LARGE photo.
Try to find a photo that is larger than 3500x2500 pixels.
Copy the photo (or download it) and open it in GIMP.
Now UPLOAD the same photo to DropBox.
Keep track of how long this takes.
Make an estimate of the BANDWIDTH demonstrated.
You will need to KEEP your photos of the school, as we will
use them tomorrow in class. If you have time, or if you want
to continue outside class time, take some more photos
of the school.
Class Discussion
What are issues connected to memory, bandwidth and file sizes
in popular digital devices like cell phones, cameras and
computers?
Homework -
#1 Go home and find a device that contains a MEMORY CARD -
probably SD or MicroSD. Look at the card to
see
how BIG it is (in GigaBytes)
#2 If possible (if your parents permit it) bring a CAMERA to
class tomorrow - that could be a SmartPhone or
Cell Phone, or even the camera in a MacBook.
If you can't bring one, you can share with
someone else.
#3 Read these notes and bring questions to class.
We will continue our discussion of technical vocabulary.
Today (and during the break)
Find advertisements and specifications for digital devices.
These include:
- digital cameras
- video cameras
- digital TVs
- computers (laptops)
- tablet computers
- smart phones
- media players (MP3 players)
- any other digital electronic devices
Write notes about vocabulary words the you do not understand completely. You can look for interesting devices at Amazon, and look at the Technical Details sheet - for example:
Technische Details or technical details or See more product details
Bring notes and questions with you to class after the break.
1. We will discuss observations about the quality of the various videos.
2. Spend the rest of the period as follows:
- upload your video to Dropbox (everyone uploads their
own copy)
- add a link to your ePortfolio linking to your
video
- make any further additions and improvements to your
ePortfolio
You will find many student videos at: file://hamlet/labs/ComputerTechnology/
Hamlet is a server in our school's LAN(local area
network).
To access this server, you need to do the following:
|
Networked PCs (cables) |
MacBooks |
Wireless Windows PCs |
|
Open [Start][Computer] |
Press Cmd K |
??? |
We will discuss some of the technical issues.
Then do the following:
Watch several of the other students' videos, preferably with sound
For each video, rate it in the following
categories:
Were the video clips exciting/entertaining?
Was it informational - did you understand/learn something?
Did the music/sound fit well with the video?
Did it seem complete or incomplete?
Decide which of the following attributes
were important for a good video:
picture quality
action
interesting music
fantastic scenery
size of the video file
clear, informative text
interesting video effects and transitions
Suggest other factors that might be important for creating good videos.
Take notes and prepare for a class discussion tomorrow.
To turn in your video you can:
- copy it onto a USB Stick
- copy it onto an external hard-disk
- copy it directly to the teacher's PC at
11D-010 ... into the NewsVideos folder
Make sure your folder (or .zip archive) has the names of ALL
the authors, e.g. "FredFlintstone-BarneyRubble-BamBam".
TOMORROW we will spend a day watching all the videos
and making suggestions about what is good and what is not so good.
Be sure to bring headphones with you - otherwise you can't hear the
sound.
TODAY - Try out some ofthese
free
eCard services.
Your investigation should include sending a card
to your own email account and viewing the result.
Here
is
a finished video - it is quite good, but downloads very slowly.
You can watch it and others (much faster) at FIS, using a LAN server, by
accessing:
file://hamlet/labs/ComputerTechnology/
Your video is due on Monday 10 Dec.
If you don't have class on that day, you can turn it in early (on
Friday),
or come in during lunch to turn it in. You will not be able to send
it as an email attachment - you need to sit in room 276 and turn it in.
You must turn in all the following:
the finished video (as .wmv or .mov or m4v or some other normal video format)
the project file (in MovieMaker, this is a .WLMP file)
all the original video clips (.avi files) and sound files (.mp3)
all the files should be in one single folder OR in a .zip archive
The teacher will tell you how to submit the files - via email won't work.
Read these notes about creating a News Summary Video.
Use a video capture program to cut out pieces of
YouTube videos (or other videos).
Save the pieces in a folder - we will be adding sound and pasting the
pieces together
in the next few days. We will be adding sound afterward, so it does not
matter
whether you record the soundtrack of the video or not.
The following programs are recommended for video capture:
Ubuntu - Desktop Recorder (install from Ubuntu Software Center)
Windows - Jing
or CamStudio
You can COPY CamStudio from the V: drive at:
V:\Mulkey
Dave\PortableApps\CamStudioPortable
Mac - Jing
(or anything else that works)
You may use any other software, as long as it can
cut out pieces of a YouTube video.
Find out how to:
Get better quality
Produce an SWF file (with a web-page)
If you still have not turned in your .ZIP archive containing
your animations web-page, GET HELP FROM THE TEACHER.
The animations shown below are actually GIF Animations.
A .GIF Animation is a single file that contains all the frames
of your animation. It does not require any JavaScript to make
it run. That means you can simply insert it into a web-page.
That's much easier, but less flexible because you cannot change
the timing, and you cannot change the pictures later.
Sometimes a .GIF Animation is the right thing to do, so we'll practice.
(1) Chose one of your animations that you did last week
(2) Go to this web-site : http://makeagif.com
(3) You must upload your pictures.
You probably want to change the timing -
you can make your animation slow or fast,
as you wish.
You might also want to change the size, so
your animation
is more less than 400 pixels wide.
(4) Once it is created, you can download it by right-clicking
and choosing [Save].
(5) If time permits, make another .GIF Animation.
Wednesday we will start a new project, and you will
find the .GIF Animations are useful. Today you can practice.
How to turn it in:
|
We have been making simple slide-shows that display a sequence of photographs.
An animation is a sequence of pictures that are quite similar,
with just a
small change between successive frames (images). Here are some
examples:


![]()
![]()
Simple Movement
Stick-Man
Cartoons
Smileys
These are relatively simple to make.
Use Inkscape to draw a simple
picture, perhaps pasting in
some standard pieces like the space-ship.
Save the first frame - call it
PIC1 or something -
by EXPORTING to a BITMAP
Change the picture a bit, by moving one of
the pieces like the space-ship,
or resizing a piece (like the bubble gum), or moving a piece like the
legs
EXPORT another picture, e.g. PIC2
Make another small change, export PIC3
Make sure you are EXPORTING to a BITMAP -
don't use SAVE-AS -
this will be a PNG file or a JPG
Once you have a sequence of images, say 10
images, you can create
a slide show. Use setTimeout to make it run
automatically,
and run it pretty fast, like 200 milliseconds per frame
Don't spend too much time with the graphics editor, e.g. don't make
it
super pretty - it's the animation that makes it interesting.
Keep your animations simple, probably 10-20 frames each.
The goal is to become fast and efficient in producing these.
Your animations will be displayed by JavaScript commands.
Make as many animations as you can in 1 week and collect them in one
web-page -
you will turn this in for a grade at the end of next week.
When you put multiple animations in one page, remember that you must
change all the names in the JavaScript commands after making an extra
copy of the JavaScript commands.
We can make a slide-show run automatically, like this:
This requires some slightly different JavaScript:
|
<script> |
Also, you must assign an ID to your picture.
Do this in the Advanced Propery Editor / HTML Attributes
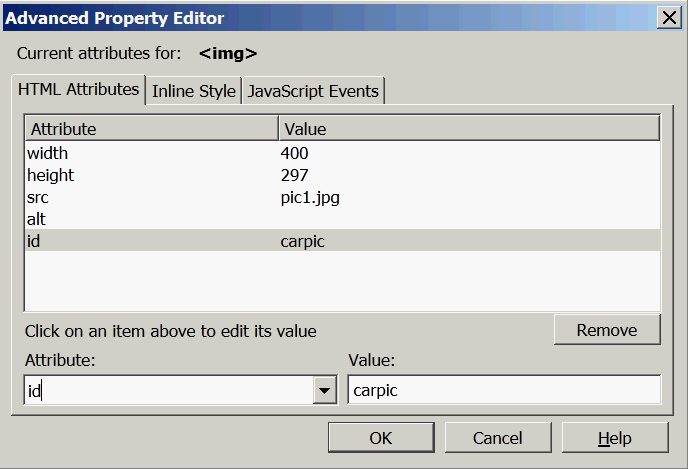
The teacher will explain what all this means -
you should take notes on the paper copy you received.
We will look at the Newsletters on Google Docs,
and discuss ways to improve the appearance.
Slide Shows
There are many ways to add graphics to improve publications.
A very simple method is to create a slide show to display a
sequence of photographs or images. Here are a couple examples:
Cute Cars
Math Lesson
First Slide Show
Our first slide show will function like the math lesson above.
Each time the user clicks the picture, it changes to the next picture.
This is relatively easy to accomplish, by using JavaScript.
Here is how to do it:
Find 4 pictures for your slide show.
Find them on Google images
and SAVE the images into a single FOLDER on your hard-disk.
They should all be roughly the same size. It's simplest if you
name them:
pic1.jpg , pic2.jpg , pic3.jpg , pic4.jpg
In SeaMonkey, create a New Composer Page,
and SAVE the page
into the same folder with your pictures.
Insert an Image into your web-page.
It should contain the FIRST
image that you wish to display.
Now you must write a big bunch of
JavaScript commands,
like this:
|
<script> |
Type the JavaScript commands just above
the </body> tag in the HTML source.
To make the picture clickable, add this JavaScript event in the image
properties:
[ onclick ] carclick(this)
Be sure this is finished before our next class, as we will be improving
it to make it run automatically. If you don't have a working slide
show,
you won't be able to take the next step.
Newsletter Due Date = 4 Nov (Sunday)
Be sure to make your newsletter attractive, as well as containing
interesting information:
add a few pictures
put a headline/title on each summary
use a LARGE FONT for the headlines
use colors somewhere - perhaps in the headlines - or background blocks, ala Windows 8
discuss the overall appearance and plan with the entire group
Here are some examples of newsletters that look nice:
Tech Crunch
Quebec
Newsletter FIS
News
Here are some examples of newsletters that DON'T look very nice:
Elementary
School MCMGA
Frankfurt
Events
Google Docs Introduction and Group Newsletter
Reading
You should spend at least one hour
reading news stories about computers.
You will find links to news stories on the main page of
the class web-site, at http://fiscomp.weebly.com.
Click on the pictures in the right-hand column under Latest Tech
Ideas.
Or you can look for interesting news stories by using Google, but
that's harder.
Homework - Write a short summary of an interesting story that
you found.
Include an explanation of WHY you found the story interesting.
Bring this with you on Monday and be prepared to share this
during class.
Our first Wiki page just contained URL addresses for ePortfolios (WIX).
That is useful, but a simple list of names and/or URLs isn't very
exciting.
The next task is to share some interesting stories.
These stories could take many different forms, about many different
topics:
- vacations and trips
- IT news (the summaries from last week)
- current events and news
- school activities
- school announcements (e.g. daily bulletin)
A WIKI is one approach to this type of information sharing.
Other approaches are possible. We will discuss this today,
and seek out an optimal solution.
A WIKI is a good way to share information.
It allows for many-to-many information flow.
That means that many people can enter information,
and many people can see the information.
First Task (a simple one)
All the Computer Tech students have ePortfolios.
These have links each student's work (probably stored in Dropbox).
Unfortunately, only the teacher has the addresses of all these
ePortfolios.
We would like a complete list of all the ePortfolio addresses.
someone needs to create a FIS-Comp-Tech Wiki on Wikispaces
we need to agree on access rights,
and the creator of the Wiki
will need to provide appropriate access rights for all users
each student needs to type his/her
ePortfolio address (URL)
into this Wiki, making it into a proper link
the resulting Wiki needs to be well
organized, not a jumbled
mess of text and links
all the links need to work correctly
the result needs to be TESTED - that includes
- checking that all the links work
- checking that they work on various computers
- checking that they work on various platforms
A simple list of LINKS is not very attractive. The WIKI needs some
decoration.
Rollover images sound attractive, but that will be difficult.
Maybe we can do that later.
First, investigate the WIDGETS available in Wikispaces. This
investigation can
be done in a separate account, with each student trying things out on
their own.
Then the students can share their ideas - how?
How can we share information (mostly digital) with other
people?
For example, how could we share the Rollover pages with lots of people,
or share the ePortfolios with lots of people?
There are many possible ways to do this:
web-sites and web-pages
Google docs
Wix
USB sticks
dropbox
printing / photocopying
talking
and many others
What issues (e.g. problems) are important when sharing?
In general terms, we worry about the following :
convenience
reliability
compatibility
We will discuss the technical issues associated with these USABILITY goals.
Finishing
If you have not finished your Funny Photos rollover page,
you may work on it today. Be sure to finish and send the teacher
an eMail before Monday (e.g. Sunday at the latest).
Reading
Next week we will start discussing some technical details
of computer systems. Before Monday, you should find
an interesting news story about computer systems - a story
that deals with some technical details. You should spend
at least one hour reading news stories about computers.
You will find links to news stories on the main page of
the class web-site, at http://fiscomp.weebly.com.
Click on the pictures in the right-hand column under Latest Tech
Ideas.
Or you can look for interesting news stories by using Google,
but that's harder.
Homework - Write a short summary of an interesting story that you
found.
Include an explanation of WHY you found the story
interesting.
Bring your summary with you on Monday and prepare to discuss
it during class.
To turn in your Funny Photos Rollover page, do the following:
In your DropBox account, go into the PUBLIC
folder,
and create a NEW FOLDER - it can be named "rollover"
Go inside your new folder
Upload ALL the files from your
project folder -
that includes the HTML file (web-page) and ALL your photos
Click on the web-page and COPY THE PUBLIC LINK
Paste the public link address into the
address bar of the browser,
and check that your page works correctly
If the pictures don't show up, check to make sure that you
UPLOADED ALL THE FILES
Now send an email to the teacher (Dave_Mulkey@fis.edu)
containing the public link that connects to your web-page
Once you've done that, you're finished.
If you cannot successfully upload your page and get it to work,
then get help from the teacher.
You need to change one setting in SeaMonkey, to stop it from wrecking your JavaScript Event commands.
[Edit menu] => [Preferences] => [Composer]
Put a [x] checkmark on [Preserve original source formatting]
Remember, your page with at least 12 rollover pictures
is due on Thursday 18 Oct.
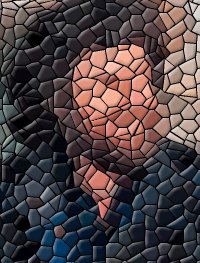
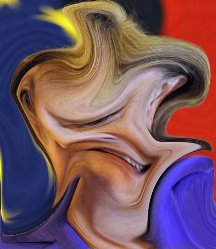
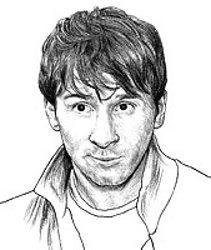
Make a page containing lots of Funny Photos - maybe 20 (??) funny photos?
Here is the idea. You take a normal photo, maybe a famous person,
and change it -
use a filter, remove the ears, whatever. Put the funny photo on a
web-page,
and create a rollover effect that changes to the original photo.
Now add an onclick event that displays the person's name and a
little more information,
e.g. "Rheinhold Messner, German mountaineer", like this:
onclick ==> alert('Rheinhold Messner, German mountaineer')
Make as many photos as you can - at least 12, hopefully more.
Put your photos in a rectangle, like 3 rows of 4 photos.
If you use large photos (like 2500x2000), you need to RESIZE
the photo so that it is small enough to load quickly, like 300x200.
Don't spend vast quantities of time changing each photo -
do something that's quick and simple, maybe funny.
Do a variety of effects on the different pictures -
don't use the same effects over and over again.
If you don't want to do people, you can do other photos -
but the result MUST be amusing, or at least interesting.
For example, you could show a very tight close-up of something,
and then the rollover shows a larger view of the entire object.
Then onclick prints some sort of information about the object.
This is due on Thursday, 18 Oct.
To turn it in, do the following:
1. Finish the page, stored in a SINGLE FOLDER
with all the pictures.
2. Upload your page to DropBox, in a FOLDER
that is stored in the PUBLIC folder so that
other people (like the teacher) can view it.
3. Send the teacher an email containing the
PUBLIC LINK connecting to your web-page.
Send this email before 16:00 on Thurs, 18
Oct.
You can make some very interesting interactive web-pages
by using .onmouseover effects by doing a bit of clever
work
with a graphics editor. For example, have a look at this site:
http://www.onlineradiostations.com/.
The faded pictures are created with a graphics editor, like GIMP.
The teacher will show you how to use GIMP to add some EFFECTS
to an image, so you can create a more interesting rollover effect.
Here
is
a very simple example page.
Today is the last class period to work on your fantasy animal.
You can do a bit more work at home if you wish.
You must send an email to the teacher with your fantasy animal
attached.
The email is due on Friday 12 Oct 2012.
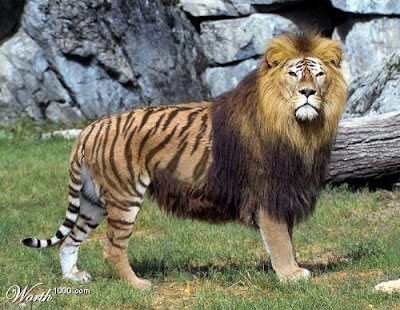
Our first GIMP project is to make a fantasy animal.
Here is a very simple example - half lion and half tiger.
http://3.bp.blogspot.com/_ovJS1Em-6dg/RjwxnnA-X1I/AAAAAAAAHlo/8DO6FQLW-Zs/s400/animals007.jpeg
That one is a bit too simple. We'd like more than just 2 animals to be combined, and more than just 2 pieces.
This one is a bit more interesting:
http://1.bp.blogspot.com/_ovJS1Em-6dg/RjwzeHA-YOI/AAAAAAAAHow/m129YBRVZXE/s1600-h/animals032.jpg
There are lots more animals at this site:
http://spluch.blogspot.de/2007/05/weird-animals-created-using-photoshop.html
These show excellent work in joining the pieces together realistically.
Your picture should be a bit more interesting - it should "say
something".
For example, a mouse with lion's paws that is crushing a can, thanks to
it's strong arms.
It probably helps if you have a suitable background and some "props" -
like the can.
Including some sort of action is helpful - for example,
a little mouse with big legs who is stepping on a car.
Spend some time on Google images to find the right pieces for your
creation.
We will spend 3 class periods on this - 2 days this week and one day after
vacation.
If you make more than one picture, keep all the pictures you made, not
just the best one.
It's okay if your animal's pieces to join together as perfectly as the
web-site above.
But the sizes and positions should match up sensibly.
Here is a tutorial that might be helpful:
http://www.tutorial9.net/tutorials/photoshop-tutorials/creative-photoshop-animal-king-photo-manipulation-tutorial/#1
Here are some more ideas, including a video:
http://www.mhsphoto.org/animal-composite.html
Smudge Tool
http://www.wiziq.com/tutorial/44340-Gimp-first-steps-smudge-tool-options
Find a picture of a running animal - maybe a tiger.
Use the smudge tool to make it look fast by smudging behind the animal.
Removing unwanted items
http://gimp-savvy.com/BOOK/index.html
Find an image on Google images, preferably with a landscape background.
Practice using the CLONE tool to remove parts of the foreground image.
Touching Up a Face
http://www.thismarvelouslife.com/2009/01/gimp-tutorial-how-to-retouch-a-face/
Find a face photo with bad skin and touch up the photo to make the person look better.
Combining 2 Photos
http://www.wikihow.com/Make-a-Fake-Picture-With-Famous-People-to-Impress-Your-Friends-and-Family
Find 2 faces and combine them into a single photo
Adding Fog / Clouds
http://gimpguru.org/Tutorials/SimulatedFog/
Take a landscape picture and add fog to it.
Many Clever Ideas for Combining Images
http://tag.wonderhowto.com/combine-photos-in-gimp/
Choose any one of the tutorials and do what it says.
Here
is the test. You need to write your instructions on paper
and turn it in when you are finished.
If you finish early, please look at the following web-site about phony
photos:
http://www.museumofhoaxes.com/tests/hoaxphototest.html
When writing a "how-to", include any extra details that must be observed. For example:
How To make a negative image
- make sure nothing is selected (unless you only want to negate part of
the image)
- open the [Colors] menu
- click [Invert]
Sometimes you need to do several things to accomplish one task. For example:
Make someone's nose bigger
- use the Lasso to select the nose, being careful to follow
the shape correctly
- Copy and Edit/Paste/As a New Image
- Image/Scale Image, increase the Width - the Height increases
automatically
Click the [Scale] button when finished
- In the original image, de-select the nose
- Copy the big nose from the small image into the original image
Slide the copied nose to the right place, then deselect
the copied nose to finish
On your test on Friday, try to write complete and correct instruction like those shown above.
Today we will continue investigating FILTERS and EFFECTS, using
GIMP.
How-Tos
Filters
and
effects
If you need a Mac or Linux version of GIMP, you can download GIMP from http://www.gimp.org
We used Inkscape to draw Vector Graphics pictures to make comic strips.
Vector Graphics are created from basic shapes - each shape is an Object.
In Bit-Mapped graphics (like photographs) everything is created from single
pixels.
A typical photograph is 10 million pixels - like 4000 x 2500 pixels.
Each pixel has a distinct color. By using so many pixels we
can store
realistic photographs in a computer.
Although the pixels are not connected together in distinct objects, we
can do
interesting transformations to the entire image - for example changing all
the
colors to be brighter, or increase contrast, or change all the colors to
shades
of gray.
You will need a copy of GIMP, which runs on Windows, Mac and Linux.
You can copy the Windows version from V:\Mulkey Dave\PortableApps.
Copy the entire GIMPportable folder onto the D: drive.
If you need a Mac or Linux version, you can download GIMP from
http://www.gimp.org
Today we will investigate FILTERS and EFFECTS, using GIMP.
Filters
and
effects
Drawing
comics
with faces
List
of Inkscape tutorials
Your comic strip is due on Friday 14 Sep at 15:10 (end of
school).
You must do 2 things to finish and turn it in:
1. Upload your comic to Dropbox and create a LINK to it on your WIX eportfolio
2. Send an email to the teacher (Dave_Mulkey@fis.edu) with your comic
.svg file attached.
Please include your name and the URL (address) of your WIX
eportfolio in the email.
Finished early? Spend some time making your WIX eportfolio look
nice.
Add some pictures, maybe a video, change the background, etc.
Vector Graphics refers to drawing by using objects, like
rectangles, circles, lines and arcs.
This is different than bitmapped graphics like photographs, where
single pixels are saved.
Vector graphics are commonly used to produce attractive,
professional looking advertisements.
Also comic strips (cartoon) are commonly drawn with vector
graphics programs.
We will use Inkscape to draw some cartoons. But
first we must install Inkscape -
you can copy the folder from v:\Mulkey
Dave\portableApps\InkscapePortable onto drive d: -
and do a bit of practice with simple shapes. Read
these
notes.
If you want to install Inkscape on your own computer, you
can download it here.
The following list
of
tutorials is very helpful, but you
will need to bring some headphones tomorrow.
If you have finished your 4-picture web-page and uploaded it to Dropbox,
then you should creating an ePortfolio.
Otherwise, spend another day finishing your web-page and upload it.
You can create your ePortfolio later.
The teacher will show you how to add links to your
web-page.
Finishing Your Web-page
Dropbox is a free cloud-storage (online
storage) service.
You can upload your web-page to a free dropbox account.
Read more here.
Today you should do the following:
finish your 4-picture web-page
get a Dropbox account
upload your web-page to your Dropbox account
try accessing your web-page from a different
computer -
if it does not work correctly then you have not uploaded correctly
send an email to the teacher (Dave_Mulkey@fis.edu)
containing the address of your web-page on Dropbox.
Be sure to include your name in the email.
Homework
Finish the tasks above if you did not get finished in class.
Continue building your web-page with 4 pictures.
You must include all the following:
a larger heading at the top of the page
a nice background color for each cell in your table
a title above each picture describing it
a citation for each picture including the source (URL address)
a link on each picture that leads to the source page of the picture
Next class we will learn how to upload the web-page to a Web Server,
making it availble for the entire world to see.
Things to do today:
listen to the teacher explain the assignment - take notes
start Windows
log-in (if you don't know your account name or password, get help)
find SeaMonkey on drive D: in the portableApps folder and start it
create a new Composer page
start look for images in Google
Images that you wish to add to your page,
and try inserting these images
you don't need to finish the page - we will continue working on it next class
Homework
Write an eMail to the teacher, introducing
yourself and stating
why you enrolled in Computer Technology class
Be sure you identify yourself clearly
read these project notes about our first web-page project
Before our next class, you should get a USB stick
and a paper notebook and bring them to class next
time.
===================
Future Development Notes
Information Systems - the importance of FEEDBACK, as connected with
SIMULTANEOUS ACCESS, look at Google Docs


