Using BlueJ
BlueJ is a Java progamming editor,
with lots of other features. That means it is an IDE (Integrated
Devlopment Environment) - a lot more than just an editor. BlueJ
was created by some University lecturers for their students. It
is especially designed to make OOP (Object-Oriented Programming)
easier and more understandable.
If you need a copy of BlueJ, or you want more
information, visit their web-site: http://www.bluej.org

Installation
BlueJ should run just by copying it onto your
hard-disk - installation is not required. However, you may
need to run SelectVM one time so BlueJ finds the Java compiler.
After that, start by running the BlueJ.exe file.

Projects
In BlueJ, you must create a new project
before you can edit or run a Java class. When you name
your project, BlueJ will automatically create a directory (folder)
for saving the Java classes in that project. BlueJ does a
very good job of automatically saving files, so you never really
need to press the Save button (if you are the nervous type, go ahead
and press save). The next time you start BlueJ, it will remember
the name of the project you had open before - as long as you are
the only person using the computer. If not, you can make your
own copy of BlueJ and it will always load your project automatically.

Classes
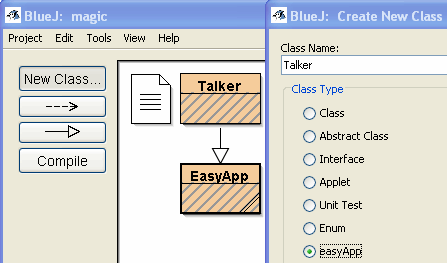
Your project can have as many classes as you want. Each class is displayed in a little box. BlueJ draws arrows to show how classes are connected - when one class uses another.
Click the [New Class] button to add a new class to your project. Type a [Name] for the class (without .java) and click on the type of class you want. For FIS students, you'oll probably start with easyApp classes. Whichever type you choose, BlueJ will use a template to write some of the commands for you - the public class header, public static void main..., maybe some sample methods, etc. The easyApp template includes a sample Button, TextField, Menu, and the actions method.
If your class extends EasyApp, you
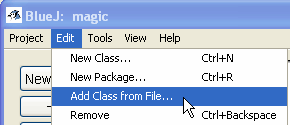
will need to add EasyApp to your project. To do this, open
the [Edit] menu and select [Add Class from File],
find a copy of EasyApp and open it. Then it should appear
in the Project window.
Editor
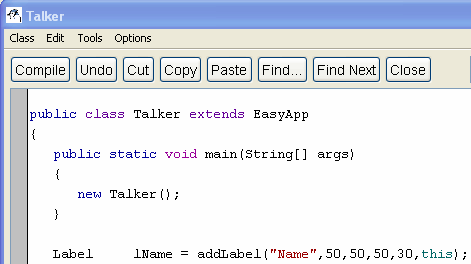
After creating a class, double-click on the box to open the editor. Type your Java commands and then click [Compile] when you are ready. If you have a synatx error, the editor will highlight the line with the error and print an error message at the bottom of the window.
You will notice there is no run button
here. You can leave the editor open when you return to the
project window to run the program, or close it if you prefer
Running a "Program"
In BlueJ, everything is Object-Oriented.
So you don't really "run a program". Instead,
you instantiate an object from a class. You don't actually
need a main method - although you can do it that way if you
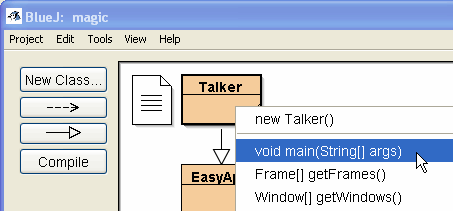
wish. To start the "program", right-click on the
"main class" (the one that should start) and choose either
new Talker() (the class) or void main. Either
way, you will see another box - just click [Ok] to start.
Stopping
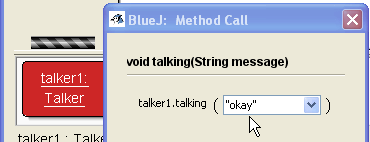
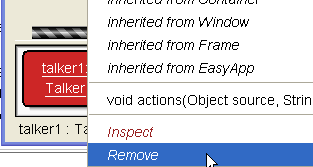
If you made a new Talker(), you'll
see a red box at the bottom of the project window. This is
a control box that can inspect the object or remove
the red box. You still need to click the [x] on the window.
If you started by running main, then you stop the program
the normal way - there is no inspector box.
Inspector
The inspector shows all the methods in your object. It will also execute any method you choose. It will ask you to type in values for all of the parameters required by the method. This is an excellent tool for testing parts of your object. You'll learn more about this later.
